


 Title Index
 Recently Changed
 Page Hierarchy
 Incomplete
 Tags
Tags


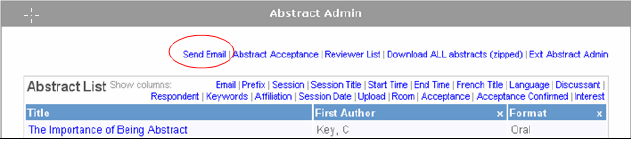
Set up your Abstract acceptance or rejection email notifications by going to Tools>Abstracts>Abstract Admin and click on the Send Email hyperlink.
You are now in the Email Setup Tool. The first thing will now create the templates for your Acceptance and Rejection emails. If you have already set these up during the Abstract Form - Setup phase then you can skip to the Send Abstract Notifications section below.
Rejection Email Template
- Enter a Subject Line for the Email Rejection notification.
- Enter an email Reply To Address.
- Select Include Name and/or Personal Title, First Name and Last Name you wish
- to include in the email.
- Complete and enter text for the First Line of your rejection notification.
- The system will auto generate the following information to include in the email notification:
- Community Name
- Abstract Title
- Format
- Select other Abstract information to include in the email:
- Abstract title
- Abstract Format
- Username and Password
- Chair Comments
- Enter Additional Information you wish Authors to Receive in the blue text box area.
- Click the Save Rejection Email button to save your template

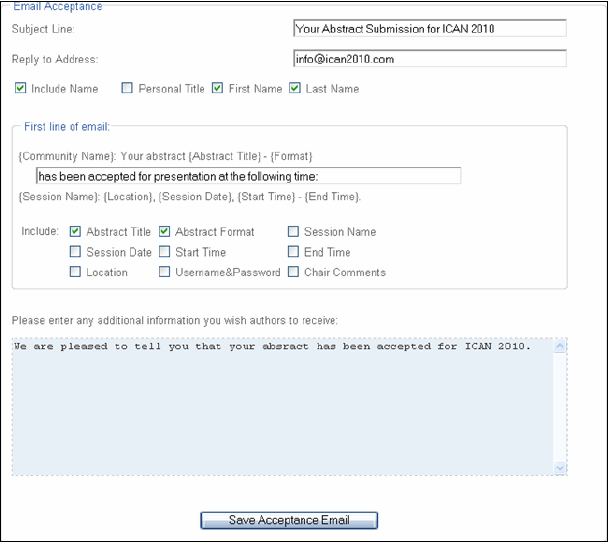
Acceptance Email Template
- Enter a Subject Line for the Email Acceptance notification.
- Enter an email Reply To Address.
- Select Include Name and/or Personal Title, First Name and Last Name you wish
- to include in the email.
- Enter text to complete the First Line of Email.
- The system will auto generate the following information to include in the email
- notification:
- Community Name (modify this by going to Tools->Community->Edit Conference)
- Abstract Title
- Format.
- Select the checkbox beside corresponding Abstract information you wish to include:
- Abstract Title
- Abstract Format
- Session Name *
- Session Date *
- Start Time *
- End Time *
- Location *
- Username and Password
- Chair Comments.
* indicates fields which are set up in the Session Scheduler tool, not within the abstract itself
- Enter the main body of the email in the Additional Information you wish Authors to Receive blue text box area. As with any blue text box area, you can use HTML coding to format the content, include hyperlinks and pictures, etc.
- Click the Save Acceptance Email button to save your template
Send Abstract Notifications
- Set up your test Email Rejection and Email Acceptance as described above. To test your templates, Select Test from the drop down list, and enter the desired target email address. Then press the appropriate button for the email you wish to test. This will send a single test email to your account which you can use to verify the formatting and functionality of the content.
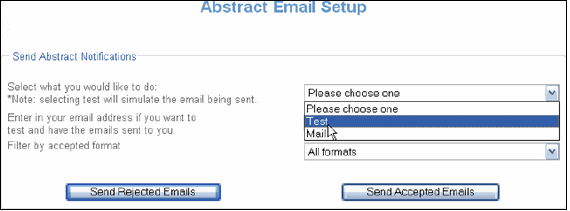
- When you are ready to send Abstract notifications to submitters select Mail from the drop down list.
- Filter by Accepted Format
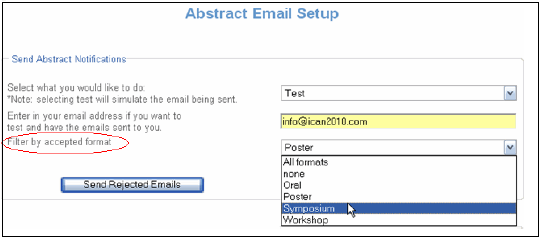
- Select an Abstract format from the drop down list to send Abstract notification to selected submitters only.
- Note: Filter by Accepted Format is for Acceptance emails only.
- Rejection emails will be sent to all Rejected Abstracts.